8. First Giveaway Teaser

Published April 27, 2012 by Jewelie Dee

Next Saturday, I will post the first of my personal tutorials, which means there will also be an earring giveaway. The tutorial will be based on the pearl and chain earring Pearl and chain earringshown in the photo. For the giveaway, the earrings will be made of genuine freshwater pearls, sterling silver cable chain, and sterling silver findings.

I would say these earrings would be worth conservatively about $30, although you’ll find similar earrings for much more on the web. Personally, I do not see how some of the sellers get away with charging $65 for a pair of earrings, but I applaud their entrepreneurial spirit!

Between now and then, I will add to the top of this blog a page titled GIVEAWAYS, outlining the rules for each contest. Remember, you must be a follower of this blog to be eligible to win a pair of earrings. To become a follower, click FOLLOW BLOG VIA EMAIL in the right hand column.

FEEDBACK AND COMMENTS. Maybe you think one of the steps of my tutorial was not clear. Maybe you have an idea that would improve the earring design. Maybe you want to share your attempt at completing the tutorial in a creative way.  Maybe you think this is the best darn blog in cyberspace. (Of course you do!) Please comment and share with me and your fellow followers. That’s what makes a blog a living, breathing, interactive thing.

A BRACELET A WEEK.  Did you know I also have a blog at www.abraceletaweek.wordpress.com? Rather than teaching, my bracelet blog showcases weekly a stunning bracelet and artisan that I have discovered on the web. Take a peek! While you are there, become a follower so that you will not miss any of my outstanding finds.

7. Basic Wire Wrap Earring Tutorial

Published April 23, 2012 by Jewelie Dee

Copyright 2012 The Art of Megan

For this tutorial, you’ll need to review Posts 3, 5, and 6 (their links are in the RECENT POSTS in the column to the right). These earrings can be made with simple loops, and they will hold up just fine. But the creator of this tutorial decided to use wrapped loops.

I am going to send you to her page (here) to view the tutorial. The pictures are a little small, so you’ll need to use this handy little technique for viewing them larger, so you can see the detail:

Hold down the Ctrl button while tapping the plus (+) key on the number line of your keyboard. Each time you tap the plus sign with the Ctrl key pressed, the photos will get a magnitude larger. (The print will also get larger.) When you want to go back down in magnification, hold down the Ctrl key and press the minus (-) key.

Have fun! If you have any questions, please feel free to put them in the Comments section of this post.

6. How to Open and Close Jump Rings and Simple Loops

Published April 13, 2012 by Jewelie Dee

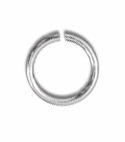
A jump ring is a circle made of wire that is used to connect components together or to serve as a holder for dangling components. Jump rings are one of the basic building blocks in jewelry making.

To use a jump ring, you must first make the opening wide enough to insert whatever components you are trying to link together. To keep the components in place, you must then close the jump ring. How you open and close your jump ring is important! Doing it the wrong way will distort its shape and, depending on the gauge of the wire, it may also weaken it and make it prone to breaking.

Oh, you may get away with doing it the wrong way a few times and think, “Pish! Posh! It really doesn’t matter!” Trust me, it does. And if you want to make good quality jewelry that will last, you will take this tip to heart.

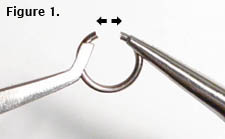
Figure 1 shows the wrong way to open or close a jump ring (pulling it apart horizontally in a parallel plane). Notice the arrows, which show the direction of the pull.

Not this way!

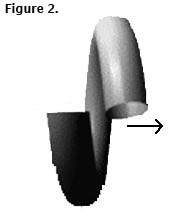
Figure 2 shows the correct method of gently twisting the cut ends in opposite directions. Actually, you are only going to twist one side away with one set of pliers as you hold the other side stable with a second set of pliers.

Can’t quite see what I mean? Go here and here for two short videos from the Instructables and The Alchemist’s Vessel websites that are much clearer than my typed instructions.

Oh, and remember simple loops from Post 3? This method, and the reasoning behind it, also applies to opening and closing simple loops.

5. How to Make a Wrapped Loop

Published April 7, 2012 by Jewelie Dee

In Post 3, you learned how to make a simple loop. When I first learned to make a simple loop, I couldn’t wait to make a charm bracelet. I made all the dangles out of head pins and added them to a chain. It was not too long before the dangles started falling off. I had used a fairly thin headpin, and the wire just could not stand up to the wear and tear.

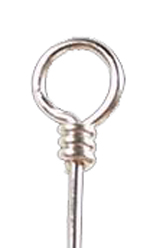
Wrapped loop

SOLUTION: Use wrapped loops instead of simple loops for constructions that are going to take a significant amount of wear and tear, or if you are going to be using wire thinner than 20 gauge (see the Tips page at the top of this blog for wire gauges).

Wrapped loops are much more secure, even though they are more tedious to create. After you have made a number of them, they become second nature and can be executed fairly quickly. The most difficult part is learning how to hold the wire as you wrap it. Practice, practice, practice (and use cheap wire for your practice).

TIP: The second most difficult part is deciding how much wire to use.  As you practice, measure the wire before creating the wrap and then keep track of the lengths of wire that are most successful for a particular use.

Here is a link for how to make a wrapped loop, courtesy of ArtBeads.com. The tutorial includes both a video and photos.

WARNING: When connecting the wrapped loop to another component (such as a charm bracelet), do not forget to attach the loop to the component before wrapping the wire. Otherwise, you will have to use a jump ring to attach your wrapped loop! The photos at the ArtBeads link have a section called Attaching a Wrapped Loop, which explains this process.

Here is another tutorial for making a wrapped loop, from TheBeadsKnees.com.uk.

Have fun, and as always, if you have any questions, feel free to post them in the Comments.

4. Make Your Own Simple Ear Wires

Published April 3, 2012 by Jewelie Dee

Next to jewelry making, saving money is my favorite hobby! Although ready-made jewelry components like ear wires are easy to find, you will want to purchase wire and make your own if you need a quantity. By doing this, you will save about half the cost.

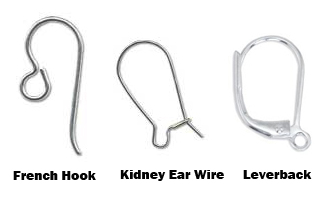
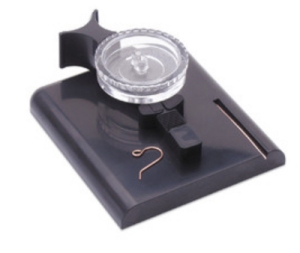
I hope one day to learn the skill of making leverbacks (see photo), but for now creating a variety of French hooks and kidney wires satisfies me. This week, I am going to point you to a tutorial for making your own simple French hook ear wires.  For those who love gadgets, I am also recommending a great tool to make mass production easier.

TUTORIAL. Barb Macy’s excellent tutorial for making the simplest of ear wires uses a pencil as a mandrel. I really like these because they are so streamlined that they do not detract from the design of my earrings. See Barb’s tutorial here.

Easy Ear Wire™ by MP Products

GADGET. If you are a Tool Girl (or Guy) like me, you’ll love the Easy Ear Wire Maker. This gadget is fun to use and easy on your hands, especially if you plan to make a large number of ear wires. YouTube has a great video on how to use the Easy Ear Wire Maker here.

This gadget is easy to find on the internet but the price varies widely across suppliers. Try not to pay more than $20.00. Type “Easy Ear Wire Maker” in the search field of your browser and comparison shop before you buy.

TIP:  Some people (like me) lose a lot of earrings when they wear French hooks. To prevent this heartbreak, buy rubber ear nuts (also called earring stoppers) and use them every time you wear your French hook earrings. They work great, and they are available at almost all jewelry suppliers. 

3. How to Make a Simple Loop

Published March 24, 2012 by Jewelie Dee

Nothing seems to befuddle beginning jewelry makers more than making a well-executed simple loop. These loops are essential to earring design. This first photo show’s what I mean by a simple loop:

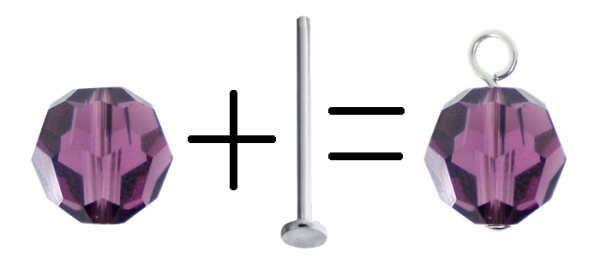
This loop is not quite complete, however, because it is not completely closed. Look at the diagram below. It shows how a simple loop creates a dangle for an earring. Notice how round the loop is, how it is centered above the bead (and centered on the straight part of the head pin), and how snugly closed the loop is. This is a well-executed simple loop.

There are many videos on the internet about making simple loops! An easy to understand technique is at this link, listed as Techniques 3 and 4. Look at the video and then look at the techniques. Then grab your round-nosed pliers and a head pin or a straight piece of wire, and try it yourself.

TIP: Once you have made a loop of the size you like, use a permanent marker to mark your pliers head at the point at which you made the loop. Then all of your future loops will be the same size!

2. Make a Simple Pair of Earrings

Published March 17, 2012 by Jewelie Dee

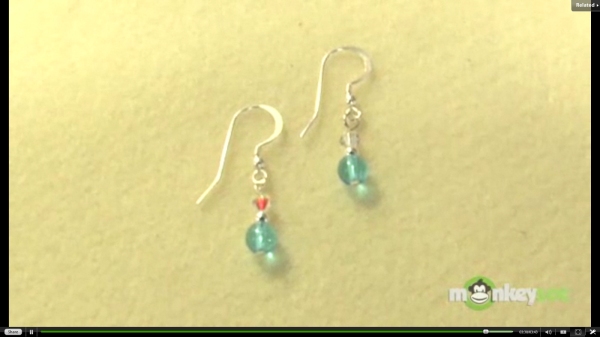
Since I do not have my new camera yet, I thought I’d give you a couple of links to very good videos for making your first set of earrings. Studio Baboo created the first video. See it here.

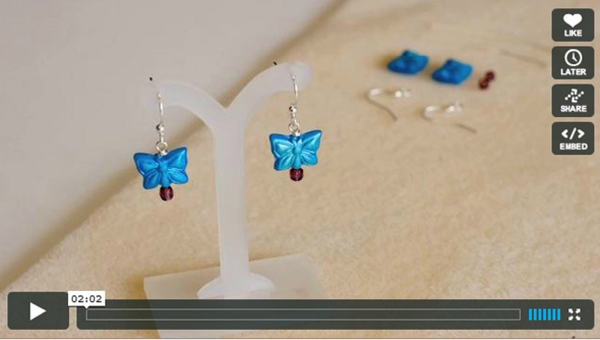
Here is a link to another video showing the same type of simple earring. This one is by Amy Surman of Oxford Bead Shop.

To access the videos, be sure to click on the links above and not on the screen shots below. They look like videos, but they are just photos so you can see what the earrings will look like. Have fun!

1. Welcome to the wonderful world of Ear Attire!

Published March 15, 2012 by Jewelie Dee

I don’t know about you, but I am not dressed until I put on earrings. Some time ago, I decided that it was just too expensive to buy my chandeliers retail, so I began learning how to make them, and all my earrings, for a fraction of the cost.

This blog will share with you what I have learned. Each week, usually on Saturdays, I will post a new earring design and instructions for executing that design. A weekly contest will award the sample earrings to one lucky reader, and the winner will be announced the following Saturday when a new earring tutorial is unveiled. I have collected a myriad of designs over the years, including classic styles and innovative contemporary designs. I hope you will be as excited as I am to discover a new creation each week.

To be eligible for weekly contests, you must be a follower of this blog. Click FOLLOW BLOG VIA EMAIL on the right side of the screen. For any contest you wish to enter, you will need to send an email to info.anearringaweek@verizon.net. I will include these instructions at contest time.

In between tutorial posts, I will post collateral information on jewelry design. I will be sharing some vital information I have discovered after many years of trial and error (and internet surfing). In the pages listed at the top of this blog, I have outlined some basic information on materials. If you ever have a question, please feel free to post it in the Comments.

To start, you might want to take a look at the learning pages at the very top of this blog.

Have fun!

Jewelie Dee